I have a bad case of wanderlust and, anytime a map is near, you'll hear me muttering "I want to go to there!" in my best Liz Lemon voice. I love to travel, and this carries over to a love of maps and globes {you can read more about my map obsession here}. I hope to instill in my boys a similar curiosity about the world and desire to explore, and that's why I will be incorporating several globes into Beckett's new room. I purchased a lighted globe that will double as a nightlight, and I am giddy excited about this DIY chalkboard globe that I just finished!
Chalkboard globes are nothing new, and there are lots of tutorials out there, but I did a few things different in making mine- namely using latex paint with a clear chalkboard finish - so I thought I'd share the process for those who might be interested.
Many chalkboard globes out there are painted a solid color - often black - but because I want Beckett and Cooper to be able to use this globe as an educational tool, it was important to me to paint the water and the land masses in different colors. To tie in with the color scheme of Beckett's new room, I wanted to paint the water dark blue, and the continents grey. Acrylic chalkboard paint is now available in a variety of colors at major craft stores, like Michael's and Hobby Lobby. Grey was easy to find, but after looking at multiple stores and online, I discovered that dark blue acrylic chalkboard paint is hard to come by. I could have had latex chalkboard paint mixed in a custom color, but then I discovered a {new to me} product in the Martha Stewart line called
Multi-Surface Chalkboard Acrylic Paint. This is a clear paint that allows you to turn nearly any surface into a chalkboard. Since I already had grey and blue latex paint that I purchased for the argyle feature wall in Beckett's room {which I'll be sharing tomorrow!!!}, this was the perfect solution - I could simply paint the globe with the latex paint that I already had and then add the chalkboard finish at the end.
Here is my supply list for this project:
- Globe
- Sand paper
- Latex paint (blue and grey)
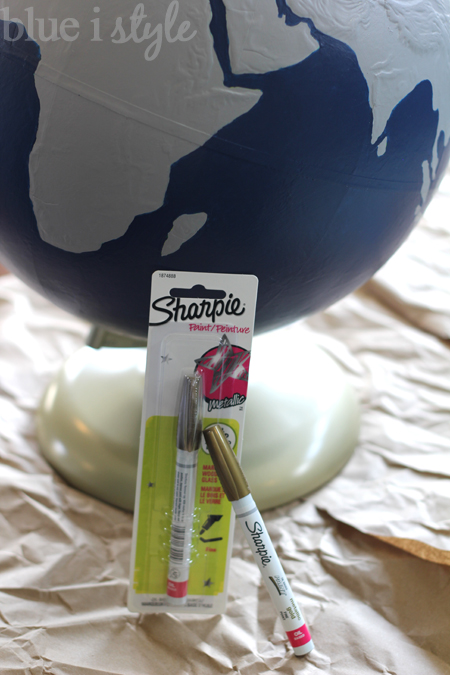
- Sharpie oil based paint marker, fine point (gold)
- Multi-Surface Chalkboard Acrylic Paint
But let me back up and walk you through the process from the beginning. The first step, of course, is to find a globe that you can paint. The globe I used is one that had been in my parents' den since I was a little kid. I mentioned to my mom that I was going to be searching thrift stores for a globe to paint and she kindly offered up their globe.
I was concerned that the latex paint might not stick to the globe, and that I would need to start with a coat of primer. However, primer would have complicated the process since I wanted to maintain the outline of the land masses. I could have primed just the water areas before painting them blue, and then separately primed the land before painting it grey, but this would have take a lot of extra time and been more difficult. I wanted to skip the priming step if possible, I sanded the globe a bit in hopes that roughing up the surface would allow the latex to stick - and it did!
This is an older globe with a paper-like surface and with relief (i.e., raised mountain areas), so I sanded lightly - just enough to remove the shiny finish without sanding off the relief.
With the sanding complete, I was ready to start painting. I debated on whether to paint the water or the land first, and I decided to start with the water - but I don't think there is a right answer. As I mentioned, I painted the globe using the same Benjamin Moore latex paint that I used on the feature wall in Beckett's room. I started with a very small paintbrush and painted all of the areas where the water meets land.
Painting a globe really makes you realize how vast the oceans are! Since there are such large areas of ocean to cover with paint, I recommend using a medium sized brush and keeping all of your brushstrokes going in a consistent direction in order to end up with a nice, smooth finish - I worked with upward brushstrokes from the southwest to the northeast because this seemed easiest given the tilt of the globe.
The blue paint went on rather thin a first, but I allowed it to dry and then added a second coat which provided much better coverage - still not perfect, but better. The globe ultimately needed a third coat of blue paint, but I waited to add this third coat after I had painted the grey so that I could also do any touch up around the edges of the land at the same time.
As I was painting the oceans, I had to make choices about which islands to preserve, and which to paint over. I wanted to keep the globe accurate enough that we can use for educational purposes, but some land masses and groups of islands are just too small to easily paint in this manner. You'll see, for example, that I maintained Cuba, Haiti and the Dominican Republic, but painted over the Bahamas, the Florida Keys, and the Caribbean Islands. But, because this is a chalkboard globe, we can always draw in the location of any islands that we might decide to visit or talk about with out boys.
With two coats of blue paint dry, I moved on to the grey paint for the continents and other land masses. I again used two sizes of brushes, a medium sized brush for the large areas, and a very small brush for all of the detailed areas along the coasts.
The grey paint provided very good coverage with just one coat, and allowed me to give better definition to the shape of intricate areas, such as around the Mediterranean Sea, prior to adding a final coat of blue paint.
One more coat of blue paint did the trick and the globe looked great!

As much as I was loving the globe at this point, I knew it was going to look even more finished once I added a gold outline around all of the land masses! I originally purchased a Sharpie brand water based gold paint marker in fine tip that I planned to use for the outlines. Fortunately, I had the forethought to test this paint marker with the clear chalkboard finish on a piece of cardboard before adding either to my globe! In my first test, when I brushed on the chalkboard finish, it completely wiped away the gold paint maker. In my second test - after allowing the paint marker to dry for much longer - the chalkboard finish did not wipe it away, but did significantly smear the gold paint. I wasn't ready to give up on the idea of the gold detail, so I made another trip to Michael's and purchased another Sharpie brand gold paint marker with a fine tip - but this time oil based instead of water based. Back home for more testing... success! The chalkboard finish didn't smear the oil based gold paint marker at all!
I had never used a Sharpie paint marker before, and I was thrilled with how well it worked. My prior experience with paint markers hasn't been great, but the Sharpie marker was perfect. It went on with a very smooth, consistent line and it easily covered both the blue and grey latex paint.
After adding all of the gold detail to the globe, I waited a couple of hours to ensure the paint was dry, and then moved on to the final step - painting on the chalkboard finish. For this step, I used a larger brush and again kept applied the paint with all of the brush strokes going in a consistent northwest to southeast direction. Had I not already tested the clear chalkboard finish on some cardboard, I would have been concerned, because the paint went on very thick and streaky white, but after about 30 minutes, the chalkboard finish had dried smooth and clear.
I allowed the chalkboard finish to continue to dry overnight, and then added a second coat the next morning. It felt dry to the touch just an hour or two later, but I exercised great restraint and allowed it to dry about 30 hours before priming the globe with chalk. The bottle recommends waiting at least 24 hours.
Priming a chalkboard surface entails using the side of a piece of chalk to fully cover the painted surface, then rubbing the chalk in with a dry cloth before using a chalkboard eraser to remove the chalk and return the globe to its original color. Priming prepares the chalkboard surface for use and ensures that the first thing you write on the chalkboard doesn't create a permanent shadow that can't be fully wiped away.
And with that, my chalkboard globe was complete and ready for use!
Everyone likes a good before and after, so here you go!
I can't wait to display this globe in Beckett's room {which should be complete in just a short couple of weeks}!
Over the years, I know this globe is going to get a lot of use for both play and educational purposes. Scott and I are taking a big trip to Africa in the fall, while the grandparents stay with the boys. We'll use the globe, along with some books I've bought the boys about African animals, to help them understand where we are going and what we'll be doing while we are away.
There are many ways to create a chalkboard globe, but for the look I was after {especially the gold detail}, the ability to add a coat of clear chalkboard paint over the fully painted globe was a perfect solution and I couldn't be happier with the outcome! Now I am thinking of all of the other surfaces to which I could add a clear chalkboard finish - and the possibilities are endless!
The links below include all of the other projects that went into the creation of the Vintage Preppy Little Gentleman's Lounge:
Labels: art, crafts, DIY, globe, kids, Maps, One Room Challenge, paint, travel


